In diesem Leitfaden erfahren Sie mehr:
- Was das OpenAI Agents SDK ist
- Warum die Integration mit einem Web Unlocker Service der Schlüssel zur Maximierung seiner Effektivität ist
- Wie man einen Python-Agenten mit dem OpenAI Agents SDK und einer Web Unlocker API in einem detaillierten Schritt-für-Schritt-Tutorial erstellt
Lasst uns eintauchen!
Was ist OpenAI Agents SDK?
Das OpenAI Agents SDK ist eine Open-Source-Python-Bibliothek von OpenAI. Sie wurde entwickelt, um agentenbasierte KI-Anwendungen auf einfache, schlanke und produktionsreife Weise zu erstellen. Diese Bibliothek ist eine verfeinerte Weiterentwicklung von OpenAIs früherem experimentellen Projekt namens Swarm.
Das OpenAI Agents SDK konzentriert sich auf die Bereitstellung einiger weniger Kernprimitive mit minimaler Abstraktion:
- Agenten: LLMs gepaart mit spezifischen Anweisungen und Werkzeugen zur Durchführung von Aufgaben
- Übergaben: Damit Agenten bei Bedarf Aufgaben an andere Agenten delegieren können
- Leitplanken: Zur Validierung von Agenten-Eingaben, um sicherzustellen, dass sie den erwarteten Formaten oder Bedingungen entsprechen
Diese Bausteine, kombiniert mit der Flexibilität von Python, machen es einfach, komplexe Interaktionen zwischen Agenten und Werkzeugen zu definieren.
Das SDK umfasst auch eine integrierte Ablaufverfolgung, sodass Sie Ihre Agenten-Workflows visualisieren, debuggen und auswerten können. Es unterstützt sogar die Feinabstimmung von Modellen für Ihre spezifischen Anwendungsfälle.
Die größten Beschränkungen dieses Ansatzes zur Entwicklung von KI-Agenten
Die meisten KI-Agenten zielen auf die Automatisierung von Vorgängen auf Webseiten ab, sei es das Abrufen von Inhalten oder die Interaktion mit Elementen auf einer Seite. Mit anderen Worten: Sie müssen das Web programmatisch durchsuchen.
Abgesehen von möglichen Missverständnissen durch das KI-Modell selbst besteht die größte Herausforderung für diese Agenten im Umgang mit den Schutzmaßnahmen von Websites. Der Grund dafür ist, dass viele Websites Anti-Bot- und Anti-Scraping-Technologien einsetzen, die KI-Agenten blockieren oder in die Irre führen können. Dies gilt insbesondere heute, da Anti-AI-CAPTCHAs und fortschrittliche Bot-Erkennungssysteme immer häufiger eingesetzt werden.
Ist dies also das Ende des Weges für KI-Webagenten? Ganz und gar nicht!
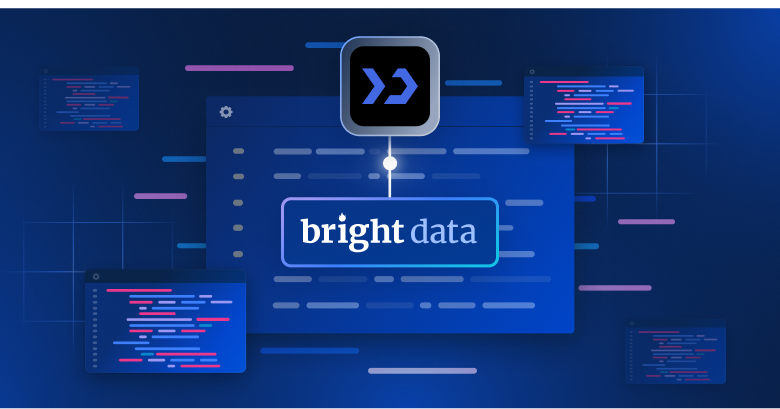
Um diese Barrieren zu überwinden, müssen Sie die Fähigkeit Ihres Agenten, im Internet zu navigieren, verbessern, indem Sie ihn in eine Lösung wie die Web Unlocker API von Bright Data integrieren. Dieses Tool funktioniert mit jedem HTTP-Client oder jeder Lösung, die eine Verbindung zum Internet herstellt (einschließlich KI-Agenten), und fungiert als Web-Unlocking-Gateway. Es liefert sauberes, unblockiertes HTML von jeder Webseite. Keine CAPTCHAs, IP-Sperren oder blockierten Inhalte mehr.
Sehen Sie, warum die Kombination des OpenAI Agents SDK mit der Web Unlocker API die ultimative Strategie für den Aufbau leistungsstarker, webfähiger KI-Agenten ist!
Integration von Agents SDK mit einer Web Unlocker API
In diesem geführten Abschnitt erfahren Sie, wie Sie das OpenAI Agents SDK mit der Web Unlocker API von Bright Data integrieren, um einen KI-Agenten zu erstellen, der Folgendes kann
- Zusammenfassen des Textes einer beliebigen Web-Seite
- Abrufen von strukturierten Produktdaten von E-Commerce-Websites
- Sammeln von Schlüsselinformationen aus Nachrichtenartikeln
Um dies zu erreichen, weist der Agent das OpenAI Agents SDK an, die Web Unlocker API als Engine zum Abrufen des Inhalts einer beliebigen Webseite zu verwenden. Sobald der Inhalt abgerufen wurde, wendet der Agent KI-Logik an, um die Daten zu extrahieren und zu formatieren, wie es für jede der oben genannten Aufgaben erforderlich ist.
Haftungsausschluss: Die drei oben genannten Anwendungsfälle sind nur Beispiele. Der hier gezeigte Ansatz kann auf viele andere Szenarien erweitert werden, indem das Verhalten des Agenten angepasst wird.
Befolgen Sie die folgenden Schritte, um einen KI-Scraping-Agenten in Python zu erstellen, der das OpenAI Agents SDK und die Web Unlocker API von Bright Data für hohe Leistung verwendet!
Voraussetzungen
Bevor Sie mit diesem Tutorial beginnen, sollten Sie sich vergewissern, dass Sie die folgenden Voraussetzungen erfüllen:
- Python 3 oder höher lokal installiert
- Ein aktives Bright Data-Konto
- Ein aktives OpenAI-Konto
- Ein grundlegendes Verständnis der Funktionsweise von HTTP-Anfragen
- Einige Kenntnisse über die Funktionsweise pydantischer Modelle
- Eine allgemeine Vorstellung davon, wie KI-Agenten funktionieren
Machen Sie sich keine Sorgen, wenn noch nicht alles eingerichtet ist. In den nächsten Abschnitten werden Sie durch die Einrichtung geführt.
Schritt 1: Projekt einrichten
Bevor wir beginnen, stellen Sie sicher, dass Sie Python 3 auf Ihrem System installiert haben. Falls nicht, laden Sie Python herunter und folgen Sie den Installationsanweisungen für Ihr Betriebssystem.
Öffnen Sie Ihr Terminal und erstellen Sie einen neuen Ordner für Ihr Scraping-Agent-Projekt:
mkdir openai-sdk-agentDer Ordner openai-sdk-agent enthält den gesamten Code für Ihren auf Python basierenden Agenten mit SDK.
Navigieren Sie in den Projektordner und richten Sie eine virtuelle Umgebung ein:
cd openai-sdk-agent
python -m venv venv
Laden Sie den Projektordner in Ihre bevorzugte Python-IDE. Visual Studio Code mit der Python-Erweiterung oder PyCharm Community Edition sind eine gute Wahl.
Erstellen Sie innerhalb des Ordners openai-sdk-agent eine neue Python-Datei namens agent.py. Ihre Ordnerstruktur sollte nun wie folgt aussehen:

Derzeit ist scraper.py ein leeres Python-Skript, aber es wird bald die gewünschte KI-Agentenlogik enthalten.
Aktivieren Sie im Terminal der IDE die virtuelle Umgebung. Unter Linux oder macOS führen Sie diesen Befehl aus:
./env/bin/activateUnter Windows führen Sie entsprechend aus:
env/Scripts/activateSie sind bereit! Sie haben jetzt eine Python-Umgebung, um einen leistungsstarken KI-Agenten mit dem OpenAI Agents SDK und einem Web Unlocker zu erstellen.
Schritt 2: Installieren Sie die Abhängigkeiten des Projekts und fangen Sie an
Dieses Projekt verwendet die folgenden Python-Bibliotheken:
openai-agents: Das OpenAI Agents SDK, mit dem sich KI-Agenten in Python erstellen lassen.Anforderungen: Zum Herstellen einer Verbindung mit der Web Unlocker-API von Bright Data und zum Abrufen des HTML-Inhalts einer Webseite, mit der der KI-Agent arbeiten soll. Weitere Informationen finden Sie in unserem Leitfaden zur Beherrschung der Python Requests-Bibliothek.pydantisch: Definition strukturierter Ausgabemodelle, die es dem Agenten ermöglichen, Daten in einem klaren und validierten Format zurückzugeben.markdownify: Konvertiert rohen HTML-Inhalt in sauberes Markdown. (Wir werden bald erklären, warum dies nützlich ist.)python-dotenv: Zum Laden von Umgebungsvariablen aus einer.env-Datei. In dieser Datei werden die Geheimnisse für OpenAI und Bright Data gespeichert.
Installieren Sie sie alle in einer aktivierten virtuellen Umgebung mit:
pip install requests pydantic openai-agents openai-agents markdownify python-dotenvInitialisieren Sie nun scraper.py mit den folgenden Importen und asynchronem Boilerplate-Code:
import asyncio
from agents import Agent, RunResult, Runner, function_tool
import requests
from pydantic import BaseModel
from markdownify import markdownify as md
from dotenv import load_dotenv

# AI agent logic...

async def run():
    # Call the async AI agent logic...

if __name__ == "__main__":
    asyncio.run(run())
Wunderbar! Zeit, die Umgebungsvariablen zu laden.
Schritt #3: Umgebungsvariablen einrichten Lesen
Fügen Sie eine .env-Datei in Ihrem Projektordner hinzu:

Diese Datei enthält Ihre Umgebungsvariablen, wie API-Schlüssel und geheime Token. Um die Umgebungsvariablen aus der .env-Datei zu laden, verwenden Sie load_dotenv() aus dem Paket dotenv:
load_dotenv()Sie können nun bestimmte Umgebungsvariablen mit os.getenv() wie folgt lesen:
os.getenv("ENV_NAME")Vergessen Sie nicht, os aus der Python-Standardbibliothek zu importieren:
import osGroßartig! Die Umgebungsvariablen sind bereit, gelesen zu werden.
Schritt #4: OpenAI Agents SDK einrichten
Sie benötigen einen gültigen OpenAI API-Schlüssel, um das OpenAI Agents SDK zu verwenden. Wenn Sie noch keinen generiert haben, folgen Sie der offiziellen Anleitung von OpenAI, um Ihren API-Schlüssel zu erstellen.
Fügen Sie den Schlüssel dann wie folgt in Ihre .env-Datei ein:
OPENAI_API_KEY="<YOUR_OPENAI_KEY>"Stellen Sie sicher, dass Sie den Platzhalter durch Ihren tatsächlichen Schlüssel ersetzen.
Es ist keine zusätzliche Einrichtung erforderlich, da das openai-agents SDK so konzipiert ist, dass es den API-Schlüssel automatisch aus der OPENAI_API_KEY-Umgebung liest.
Schritt #5: Web Unlocker API einrichten
Falls Sie dies noch nicht getan haben, erstellen Sie ein Bright Data-Konto. Ansonsten melden Sie sich einfach an.
Lesen Sie anschließend die offizielle Web Unlocker-Dokumentation von Bright Data, um Ihr API-Token abzurufen. Alternativ können Sie auch die folgenden Schritte ausführen.
Klicken Sie auf der Bright Data-Seite “User Dashboard” auf die Option “Get proxy products”:

Suchen Sie in der Produkttabelle die Zeile mit der Bezeichnung “unblocker” und klicken Sie darauf:

⚠️Note: Sie müssen zuerst eine neue Web Unblocker API-Zone erstellen, falls Sie dies noch nicht getan haben. Lesen Sie die Dokumentation zur Einrichtung von Web Unblocker, um loszulegen.
Kopieren Sie auf der Seite “Freischaltung” Ihr API-Token über das Symbol in der Zwischenablage:

Vergewissern Sie sich auch, dass der Schalter in der oberen rechten Ecke auf “Ein” steht, was bedeutet, dass das Web Unlocker-Produkt aktiv ist.
Vergewissern Sie sich auf der Registerkarte “Konfiguration”, dass diese Optionen für eine optimale Wirksamkeit aktiviert sind:

Fügen Sie in der Datei .env die folgende Umgebungsvariable hinzu:
BRIGHT_DATA_WEB_UNLOCKER_API_TOKEN="<YOUR_BRIGHT_DATA_WEB_UNLOCKER_API_TOKEN>"Ersetzen Sie den Platzhalter durch Ihr tatsächliches API-Token.
Perfekt! Sie können jetzt sowohl das OpenAI SDK als auch die Web Unlocker API von Bright Data in Ihrem Projekt verwenden.
Schritt #6: Erstellen Sie die Funktion zur Extraktion von Webseiteninhalten
Erstellen Sie eine get_page_content() -Funktion, die:
- Liest die Umgebungsvariable
BRIGHT_DATA_WEB_UNLOCKER_API_TOKEN - Verwendet
Anfragen, um über die angegebene URL eine Anfrage an die Web Unlocker API von Bright Data zu senden - Ruft das von der API zurückgegebene Roh-HTML ab
- Konvertiert den HTML-Code in Markdown und gibt ihn zurück
So können Sie die obige Logik umsetzen:
@function_tool
def get_page_content(url: str) -> str:
    """
    Retrieves the HTML content of a given web page using Bright Data's Web Unlocker API,
    bypassing anti-bot protections. The response is converted from raw HTML to Markdown
    for easier and cheaper processing.

    Args:
        url (str): The URL of the web page to scrape.

    Returns:
        str: The Markdown-formatted content of the requested page.
    """

    # Read the Bright Data's Web Unlocker API token from the envs
    BRIGHT_DATA_WEB_UNLOCKER_API_TOKEN = os.getenv("BRIGHT_DATA_WEB_UNLOCKER_API_TOKEN")

    # Configure the Web Unlocker API call
    api_url = "https://api.brightdata.com/request"
    headers = {
        "Content-Type": "application/json",
        "Authorization": f"Bearer {BRIGHT_DATA_WEB_UNLOCKER_API_TOKEN}"
    }
    data = {
        "zone": "unblocker",
        "url": url,
        "format": "raw"
    }

    # Make the call to Web Uncloker to retrieve the unblocked HTML of the target page
    response = requests.post(api_url, headers=headers, data=json.dumps(data))

    # Extract the raw HTML response
    html = response.text

    # Convert the HTML to markdown and return it
    markdown_text = md(html)

    return markdown_text
Hinweis 1: Die Funktion muss mit @function_tool annotiert werden. Dieser spezielle Dekorator teilt dem OpenAI Agents SDK mit, dass diese Funktion von einem Agenten als Werkzeug verwendet werden kann, um bestimmte Aktionen durchzuführen. In diesem Fall fungiert die Funktion als “Motor”, den der Agent nutzen kann, um den Inhalt der Webseite abzurufen, auf der er agieren wird.
Hinweis 2: Die Funktion get_page_content() muss die Eingabetypen explizit deklarieren.
Wenn Sie sie weglassen, erhalten Sie eine Fehlermeldung wie: Fehler beim Erhalten der Antwort: Fehlercode: 400 - {'error': {'message': "Ungültiges Schema für die Funktion 'get_page_content': In context=('properties', 'url'), schema must have a 'type' key.``"
Jetzt fragen Sie sich vielleicht: Warum sollte man HTML in Markdown konvertieren? Die Antwort ist einfach – Effizienz und Kosteneffektivität!
HTML ist sehr langatmig und enthält oft unnötige Elemente wie Skripte, Stile und Metadaten. Das sind Inhalte, die KI-Agenten in der Regel nicht benötigen. Wenn Ihr Agent nur das Wesentliche wie Text, Links und Bilder benötigt, bietet Markdown eine viel sauberere und kompaktere Darstellung.
Im Einzelnen kann die HTML-zu-Markdown-Umwandlung die Eingabegröße um bis zu 99 % reduzieren, was beides spart:
- Token, die die Kosten für die Verwendung von OpenAI-Modellen senken
- Verarbeitungszeit, da die Modelle bei kleineren Eingaben schneller arbeiten
Weitere Informationen finden Sie in dem Artikel “Why Are the New AI Agents Choosing Markdown Over HTML?“.
Schritt Nr. 7: Definieren der Datenmodelle
Damit OpenAI SDK-Agenten richtig funktionieren, benötigen sie Pydantic-Modelle, um die erwartete Struktur ihrer Ausgabedaten zu definieren. Denken Sie daran, dass der Agent, den wir bauen, eine von drei möglichen Ausgaben zurückgeben kann:
- Eine Zusammenfassung der Seite
- Informationen zum Produkt
- Informationen zum Nachrichtenartikel
Lassen Sie uns also drei entsprechende pydantische Modelle definieren:
class Summary(BaseModel):
    summary: str

class Product(BaseModel):
    name: str
    price: Optional[float] = None
    currency: Optional[str] = None
    ratings: Optional[int] = None
    rating_score: Optional[float] = None

class News(BaseModel):
    title: str
    subtitle: Optional[str] = None
    authors: Optional[List[str]] = None
    text: str
publication_date: Optional[str] = NoneHinweis: Die Verwendung von Optional macht Ihren Agenten robuster und vielseitiger. Nicht alle Seiten werden alle im Schema definierten Daten enthalten, so dass diese Flexibilität hilft, Fehler zu vermeiden, wenn Felder fehlen.
Vergessen Sie nicht, Optional und Liste aus der Eingabe zu importieren:
from typing import Optional, ListFantastisch! Sie sind nun bereit, die Logik Ihres Agenten aufzubauen.
Schritt Nr. 8: Initialisierung der Agentenlogik
Verwenden Sie die Agentenklasse aus dem openai-agents SDK, um die drei spezialisierten Agenten zu definieren:
summarization_agent = Agent(
    name="Text Summarization Agent",
    instructions="You are a content summarization agent that summarizes the input text.",
    tools=[get_page_content],
    output_type=Summary,
)

product_info_agent = Agent(
    name="Product Information Agent",
    instructions="You are a product parsing agent that extracts product details from text.",
    tools=[get_page_content],
    output_type=Product,
)

news_info_agent = Agent(
    name="News Information Agent",
    instructions="You are a news parsing agent that extracts relevant news details from text.",
    tools=[get_page_content],
    output_type=News,
)
Jeder Agent:
- Enthält eine klare Anweisung, die beschreibt, was er tun soll. Dies ist das, was das OpenAI Agents SDK verwenden wird, um das Verhalten des Agenten zu steuern.
- Verwendet
get_page_content()als Werkzeug zum Abrufen der Eingabedaten (d. h. des Inhalts der Webseite). - Gibt seine Ausgabe in einem der zuvor definierten Pydantic-Modelle
(Zusammenfassung,ProduktoderNachrichten) zurück.
Um Benutzeranfragen automatisch an den richtigen spezialisierten Agenten weiterzuleiten, definieren Sie einen übergeordneten Agenten:
routing_agent = Agent(
    name="Routing Agent",
    instructions=(
        "You are a high-level decision-making agent. Based on the user's request, "
        "hand off the task to the appropriate agent."
    ),
    handoffs=[summarization_agent, product_info_agent, news_info_agent],
)
Dies ist der Agent, den Sie in Ihrer run() -Funktion abfragen werden, um die Logik des KI-Agenten zu steuern.
Schritt Nr. 9: Implementierung der Ausführungsschleife
Fügen Sie in der run() -Funktion die folgende Schleife ein, um Ihre KI-Agentenlogik zu starten:
# Keep iterating until the use type "exit"
while True:
    # Read the user's request
    request = input("Your request -> ")
    # Stops the execution if the user types "exit"
    if request.lower() in ["exit"]:
        print("Exiting the agent...")
        break
    # Read the page URL to operate on
    url = input("Page URL -> ")

    # Routing the user's request to the right agent
    output = await Runner.run(routing_agent, input=f"{request} {url}")
    # Conver the agent's output to a JSON string
    json_output = json.dumps(output.final_output.model_dump(), indent=4)
    print(f"Output -> n{json_output}nn")
Diese Schleife wartet kontinuierlich auf Benutzereingaben und verarbeitet jede Anfrage, indem sie sie an den richtigen Agenten (Zusammenfassung, Produkt oder Nachrichten) weiterleitet. Sie kombiniert die Anfrage des Benutzers mit der Ziel-URL, führt die Logik aus und gibt dann das strukturierte Ergebnis im JSON-Format mit json aus. Importieren Sie es mit:
import jsonErstaunlich! Ihre OpenAI Agents SDK-Integration mit der Web Unlocker API von Bright Data ist nun abgeschlossen.
Schritt Nr. 10: Alles zusammenfügen
Ihre scraper.py-Datei sollte nun enthalten:
import asyncio
from agents import Agent, RunResult, Runner, function_tool
import requests
from pydantic import BaseModel
from markdownify import markdownify as md
from dotenv import load_dotenv
import os
from typing import Optional, List
import json

# Load the environment variables from the .env file
load_dotenv()

# Define the Pydantic output models for your AI agent
class Summary(BaseModel):
    summary: str

class Product(BaseModel):
    name: str
    price: Optional[float] = None
    currency: Optional[str] = None
    ratings: Optional[int] = None
    rating_score: Optional[float] = None

class News(BaseModel):
    title: str
    subtitle: Optional[str] = None
    authors: Optional[List[str]] = None
    text: str
    publication_date: Optional[str] = None

@function_tool
def get_page_content(url: str) -> str:
    """
    Retrieves the HTML content of a given web page using Bright Data's Web Unlocker API,
    bypassing anti-bot protections. The response is converted from raw HTML to Markdown
    for easier and cheaper processing.

    Args:
        url (str): The URL of the web page to scrape.

    Returns:
        str: The Markdown-formatted content of the requested page.
    """

    # Read the Bright Data's Web Unlocker API token from the envs
    BRIGHT_DATA_WEB_UNLOCKER_API_TOKEN = os.getenv("BRIGHT_DATA_WEB_UNLOCKER_API_TOKEN")

    # Configure the Web Unlocker API call
    api_url = "https://api.brightdata.com/request"
    headers = {
        "Content-Type": "application/json",
        "Authorization": f"Bearer {BRIGHT_DATA_WEB_UNLOCKER_API_TOKEN}"
    }
    data = {
        "zone": "unblocker",
        "url": url,
        "format": "raw"
    }

    # Make the call to Web Uncloker to retrieve the unblocked HTML of the target page
    response = requests.post(api_url, headers=headers, data=json.dumps(data))

    # Extract the raw HTML response
    html = response.text

    # Convert the HTML to markdown and return it
    markdown_text = md(html)

    return markdown_text

# Define the individual OpenAI agents
summarization_agent = Agent(
    name="Text Summarization Agent",
    instructions="You are a content summarization agent that summarizes the input text.",
    tools=[get_page_content],
    output_type=Summary,
)

product_info_agent = Agent(
    name="Product Information Agent",
    instructions="You are a product parsing agent that extracts product details from text.",
    tools=[get_page_content],
    output_type=Product,
)

news_info_agent = Agent(
    name="News Information Agent",
    instructions="You are a news parsing agent that extracts relevant news details from text.",
    tools=[get_page_content],
    output_type=News,
)

# Define a high-level routing agent that delegates tasks to the appropriate specialized agent
routing_agent = Agent(
    name="Routing Agent",
    instructions=(
        "You are a high-level decision-making agent. Based on the user's request, "
        "hand off the task to the appropriate agent."
    ),
    handoffs=[summarization_agent, product_info_agent, news_info_agent],
)

async def run():
    # Keep iterating until the use type "exit"
    while True:
        # Read the user's request
        request = input("Your request -> ")
        # Stops the execution if the user types "exit"
        if request.lower() in ["exit"]:
            print("Exiting the agent...")
            break
        # Read the page URL to operate on
        url = input("Page URL -> ")

        # Routing the user's request to the right agent
        output = await Runner.run(routing_agent, input=f"{request} {url}")
        # Conver the agent's output to a JSON string
        json_output = json.dumps(output.final_output.model_dump(), indent=4)
        print(f"Output -> n{json_output}nn")


if __name__ == "__main__":
    asyncio.run(run())
Et voilà! In etwas mehr als 100 Zeilen Python haben Sie einen KI-Agenten erstellt, der:
- Zusammenfassen von Inhalten aus beliebigen Webseiten
- Extrahieren von Produktinformationen von jeder E-Commerce-Website
- Details aus einem beliebigen Online-Artikel herausziehen
Zeit, sie in Aktion zu sehen!
Schritt #11: Testen Sie den KI-Agenten
Um Ihren KI-Agenten zu starten, führen Sie aus:
python agent.pyNehmen wir an, Sie möchten den Inhalt von Bright Data’s AI Services Hub zusammenfassen. Geben Sie einfach eine Anfrage wie diese ein:

Nachfolgend sehen Sie das Ergebnis im JSON-Format, das Sie erhalten werden:

Nehmen Sie diesmal an, Sie möchten Produktdaten von einer Amazon-Produktseite abrufen, z. B. von der PS5-Liste:

Normalerweise würden die Amazon CAPTCHA- und Anti-Bot-Systeme Ihre Anfrage blockieren. Dank der Web Unlocker API kann Ihr KI-Agent auf die Seite zugreifen und sie analysieren, ohne blockiert zu werden:

Die Ausgabe wird sein:
{
    "name": "PlayStationu00ae5 console (slim)",
    "price": 499.0,
    "currency": "USD",
    "ratings": 6321,
    "rating_score": 4.7
}
Das sind genau die Produktdaten von der Amazon-Seite!
Stellen Sie sich vor, Sie möchten strukturierte Nachrichteninformationen aus einem Yahoo News-Artikel abrufen:

Erreichen Sie Ihr Ziel mit den folgenden Eingaben:
Your request -> Give me news info
Page URL -> https://www.yahoo.com/news/pope-francis-dies-88-080859417.html
Das Ergebnis wird sein:
{
    "title": "Pope Francis Dies at 88",
    "subtitle": null,
    "authors": [
        "Nick Vivarelli",
        "Wilson Chapman"
    ],
    "text": "Pope Francis, the 266th Catholic Church leader who tried to position the church to be more inclusive, died on Easter Monday, Vatican officials confirmed. He was 88. (omitted for brevity...)",
    "publication_date": "Mon, April 21, 2026 at 8:08 AM UTC"
}
Wieder einmal liefert der KI-Agent präzise Daten – und dank Web Unlocker gibt es keine Blockaden der Nachrichtenseite!
Schlussfolgerung
In diesem Blogbeitrag haben Sie gelernt, wie man das OpenAI Agents SDK in Kombination mit einer Web-Unlocking-API verwendet, um einen hocheffektiven Webagenten in Python zu erstellen.
Wie gezeigt, können Sie durch die Kombination des OpenAI SDK mit der Web Unlocker API von Bright Data KI-Agenten erstellen, die auf wirklich jeder Webseite zuverlässig funktionieren. Dies ist nur ein Beispiel dafür, wie die Produkte und Services von Bright Data leistungsstarke KI-Integrationen unterstützen können.
Entdecken Sie unsere Lösungen für die Entwicklung von KI-Agenten:
- Autonome KI-Agenten: Suche, Zugriff und Interaktion mit jeder Website in Echtzeit über eine Reihe leistungsstarker APIs.
- Vertikale KI-Anwendungen: Erstellen Sie zuverlässige, benutzerdefinierte Datenpipelines zur Extraktion von Webdaten aus branchenspezifischen Quellen.
- Grundlegende Modelle: Greifen Sie auf konforme, webbasierte Datensätze zu, um Pre-Training, Bewertung und Feinabstimmung zu unterstützen.
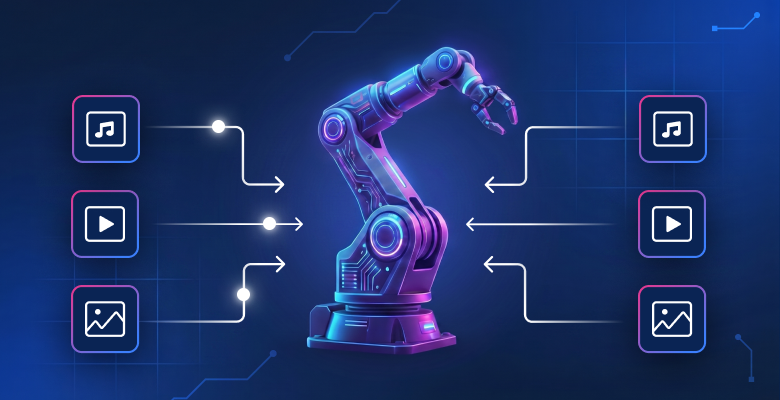
- Multimodale KI: Nutzen Sie den weltweit größten Fundus an Bildern, Videos und Audiodateien, die für KI optimiert sind.
- Datenanbieter: Verbinden Sie sich mit vertrauenswürdigen Anbietern, um hochwertige, KI-fähige Datensätze in großem Umfang zu beziehen.
- Datenpakete: Erhalten Sie kuratierte, gebrauchsfertige Datensätze – strukturiert, angereichert und mit Anmerkungen versehen.
Weitere Informationen finden Sie in unserem vollständigen Angebot an KI-Produkten.
Erstellen Sie ein Bright Data-Konto und testen Sie alle unsere Produkte und Services für die Entwicklung von KI-Agenten!