Integração do Proxy Octoparse
A integração dos Proxies Bright Data com o Octoparse aumenta a eficiência do Scraping de dados da web, proporcionando uma extração segura e anônima, ao mesmo tempo que reduz o risco de bloqueios de IP.
Este guia pode estar desatualizado. Para obter um guia atualizado, consulte nossa documentação.

- 400M+ IPs residencialis
- Sessões fixas e rotativas
- Taxa de sucesso de 99,95%
- Segmentação por localização geográfica - GRÁTIS

O que é o Octoparse?
O Octoparse é uma ferramenta fácil de usar que transforma páginas da web em dados organizados sem a necessidade de codificação. É perfeito para todos, desde iniciantes até grandes empresas, tornando o Scraping de dados da web simples para todos.
Principais recursos do Octoparse
O Octoparse se destaca por sua interface intuitiva e fácil de usar, tornando o Scraping de dados da web uma tarefa fácil para qualquer pessoa. Aproveite o poder da IA para configurações perfeitas do Scraper e mergulhe em um fluxo de trabalho visual personalizado para facilitar e aumentar a eficiência. Aproveite a coleta contínua de dados na nuvem 24 horas por dia, 7 dias por semana, e a extração de dados em tempo hábil. Supere os obstáculos do Scraping de dados com recursos como rotação de IP e tratamento de CAPTCHA. E com modelos pré-configurados para sites populares, além de tarefas personalizáveis para requisitos específicos, todos os dados da web de que você precisa estão a apenas um clique de distância.
Etapas para integrar o Octopase com os Proxies da Bright Data

Inscreva-se na Bright Data:
Após se inscrever, no painel da Bright Data, navegue até a seção“Proxy & Infraestrutura de scraping”(Infraestrutura de proxy escraping) e adicione uma nova zona designada para o uso do seu proxy.

Selecione o tipo de Proxy:
Neste exemplo, mostraremos como configurar Proxy ISP.

Solução de Proxy de nome:
Defina o tipo de IP desejado, IPs compartilhados, IPs dedicados ou IPs premium.

Selecione a contagem de IP:
Insira o número de IPs que você precisa.

Seleção de país e cidade:
Escolha o país e a cidade desejados para a localização do IP.

Escolha o domínio:
Use domínios específicos ou use “Todos os domínios” para um IP para direcionar sites que usam o mesmo IP.

Adicionar zona:
Clique no botão“Adicionar” para criar a Zona.

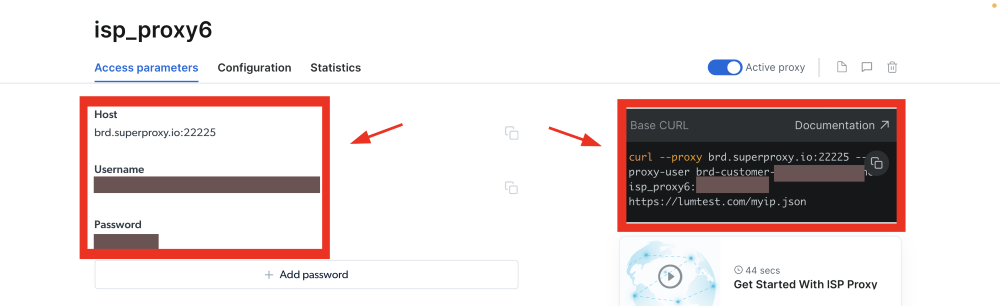
Parâmetros de acesso:
Clique no nome da sua Zona, navegue até a guia “Parâmetros de acesso” e anote as credenciais do Proxy:
- host
- porta
- nome de usuário
- senha
Configurando o Octoparse com proxies Bright Data:
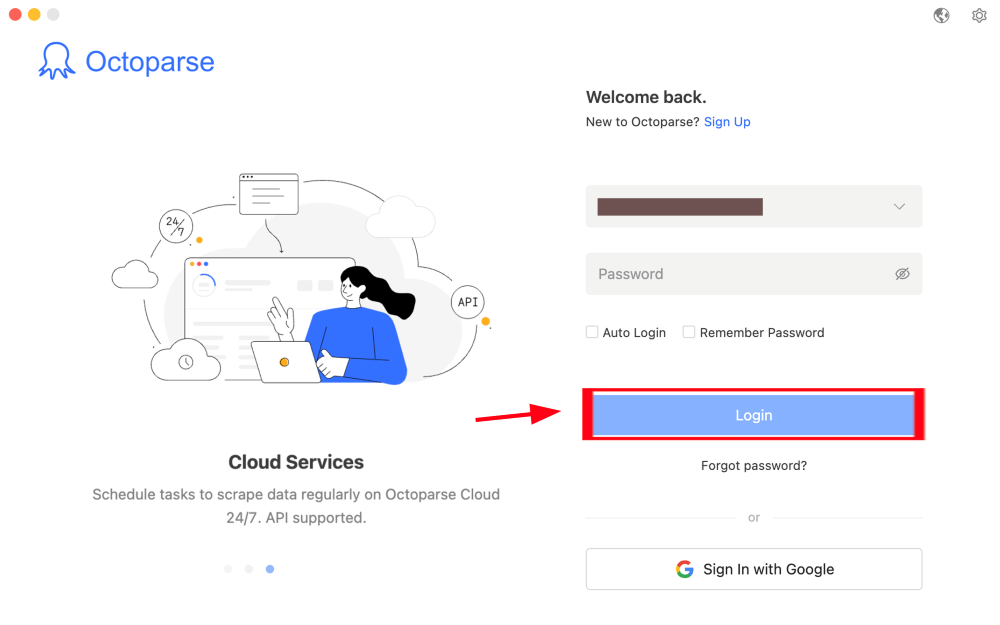
- Inscreva-se para obter uma conta gratuita no Octoparse.
- Baixe o Octoparse de acordo com o seu sistema operacional.
- Vá para as configurações no painel de login
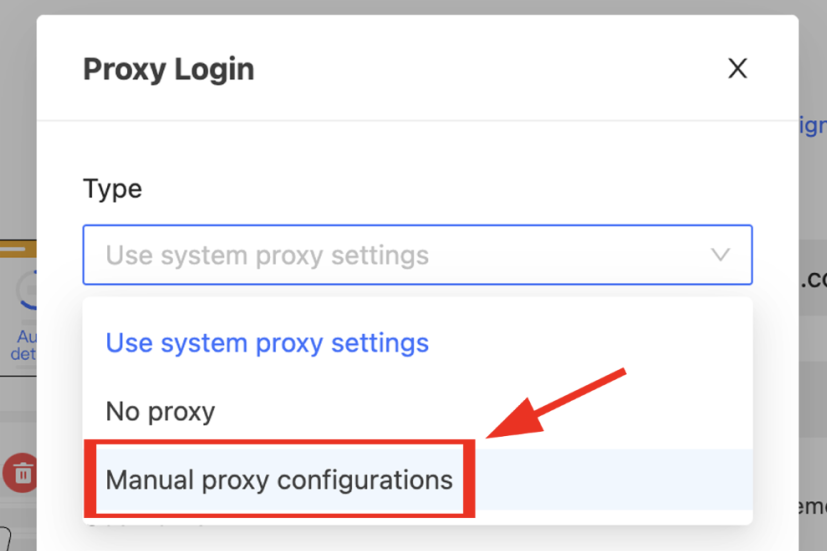
Configuração do Proxy:
Escolha Configurações manuais de Proxy.
Credenciais de Proxy:
Recupere os detalhes do Proxy necessários da sua zona Bright Data configurada anteriormente:
- Endereço IP
- Porta
- Nome de usuário
- Senha
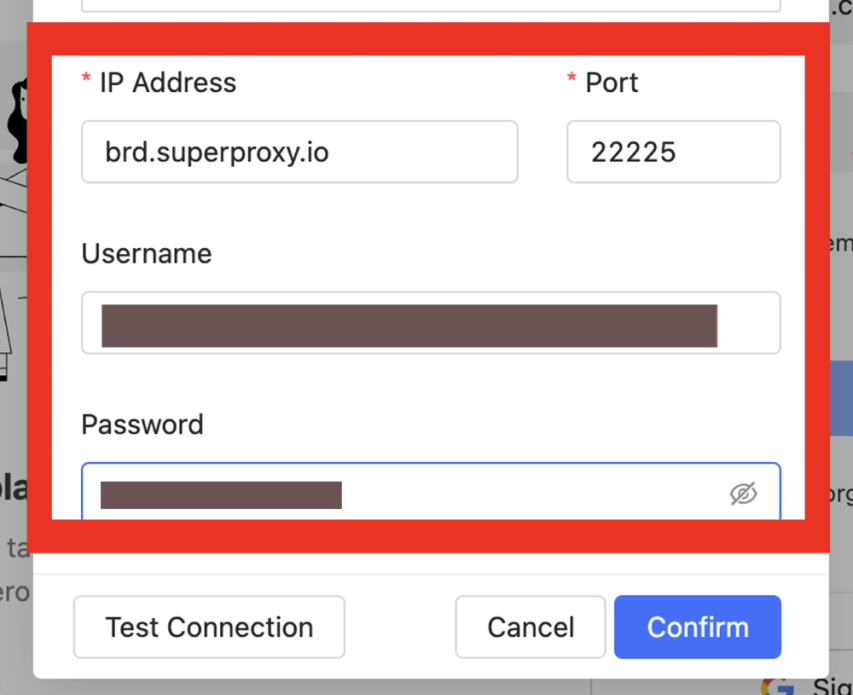
Insira os detalhes do Proxy:
Preencha os detalhes do seu Proxy
- Endereço IP: brd.superproxy.io
- Porta: 33335
- Nome de usuário: [Seu nome de usuário Bright Data]
- Senha: [Sua senha da Bright Data]
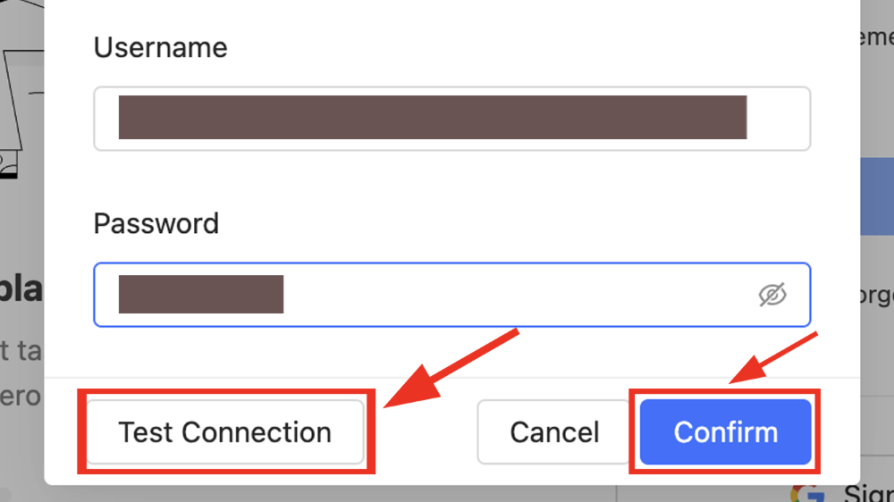
Teste a conexão:
Confirme a configuração
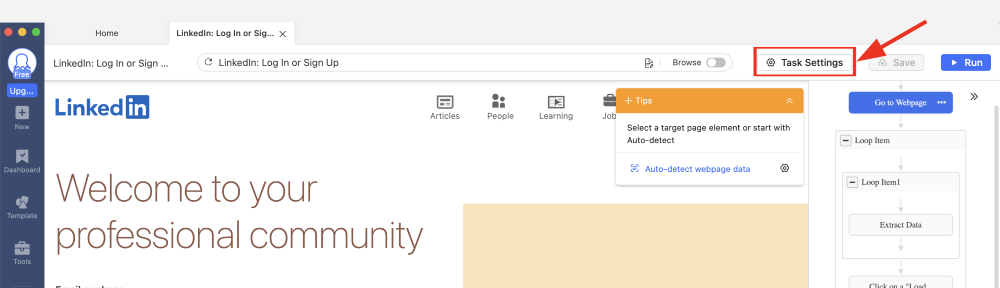
Tarefa aberta para configuração:
Abra a tarefa para a qual deseja configurar Proxies e acesse as configurações da tarefa.
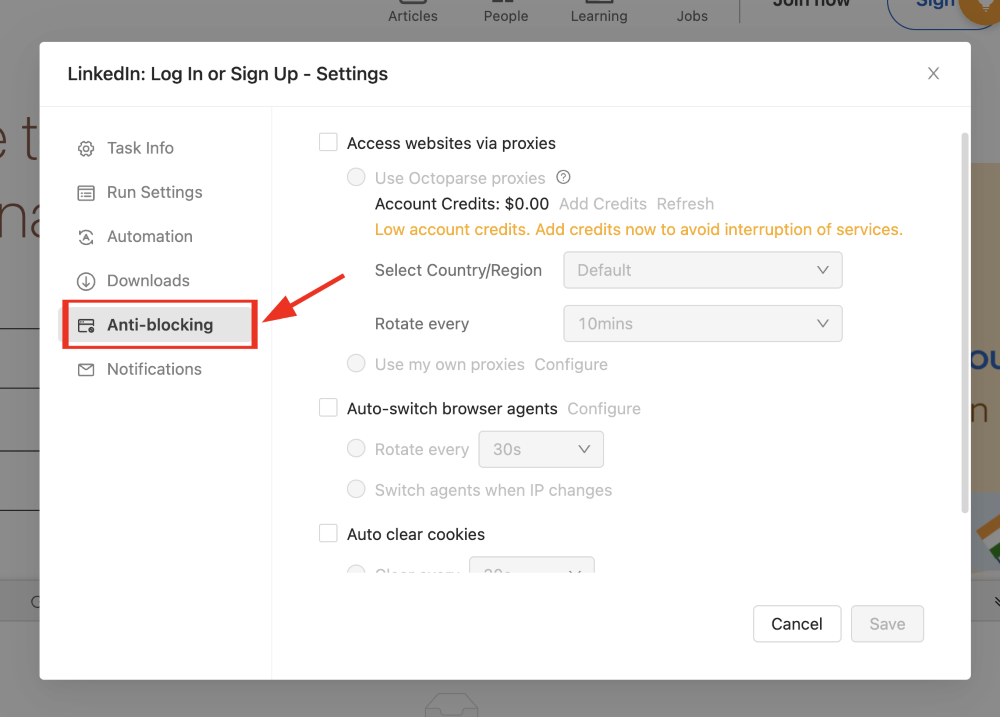
Seção antibloqueio:
Vá para a seção Anti-bloqueio.
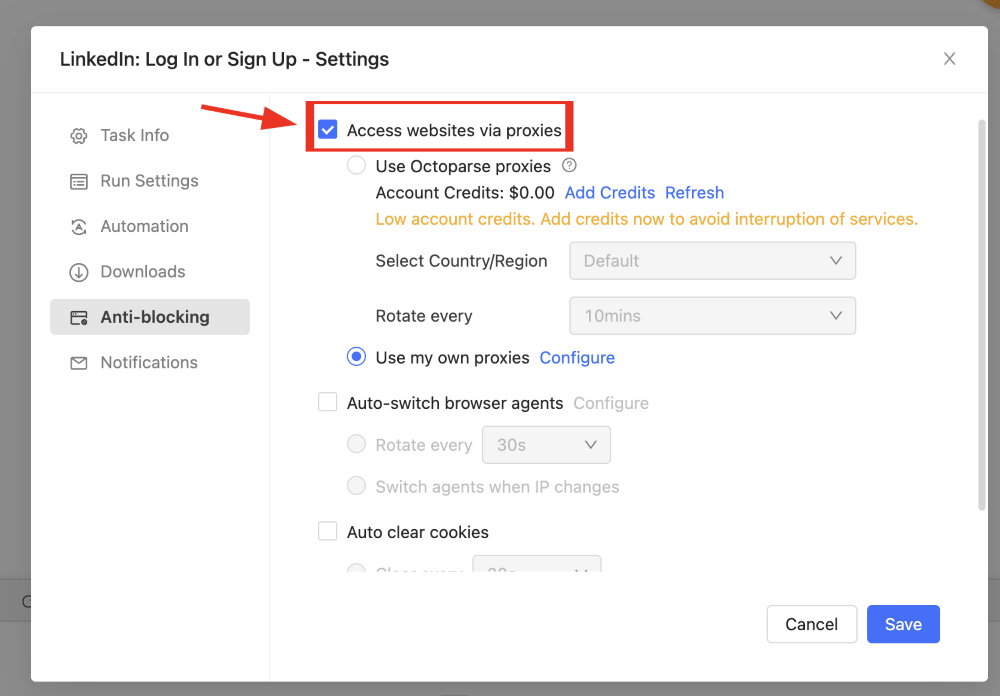
Verifique o acesso a sites por meio de Proxies.
Agora, escolha a opção “Acessar sites por meio de Proxies”.
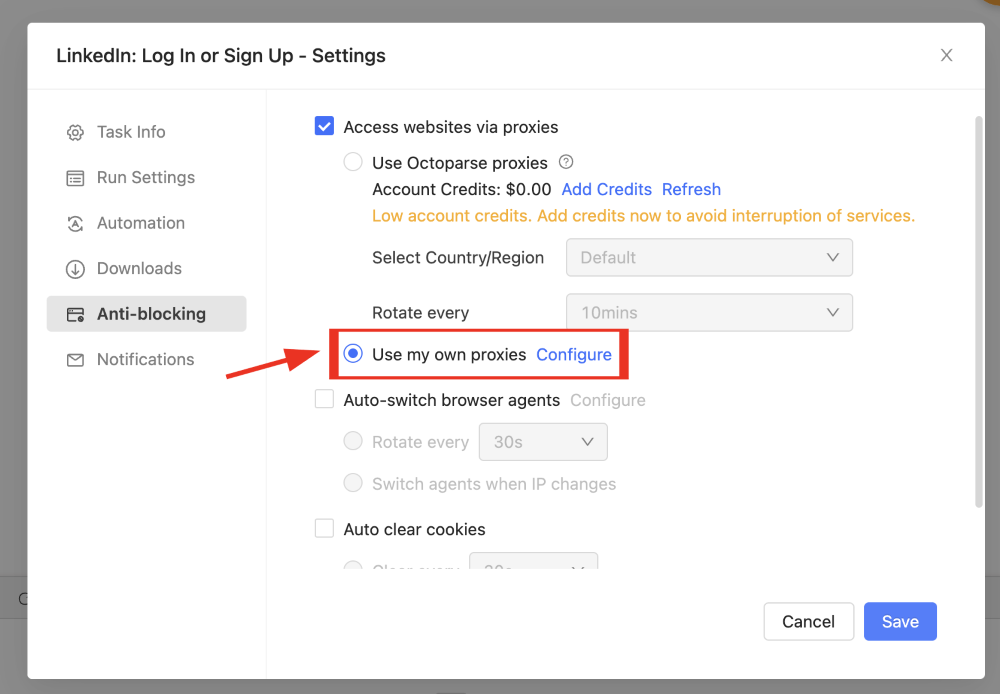
Selecione Usar meus próprios Proxies:
Selecione Usar meus próprios Proxies e clique em configurar.
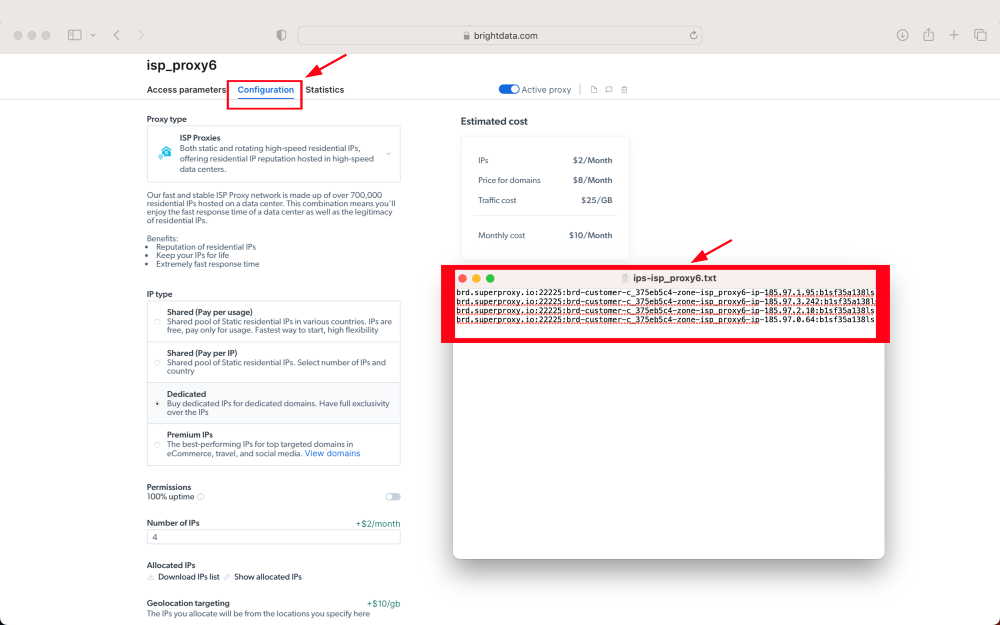
Configuração da zona Bright Data:
Volte para a seção de configuração da zona Bright Data e baixe a lista de IPs.
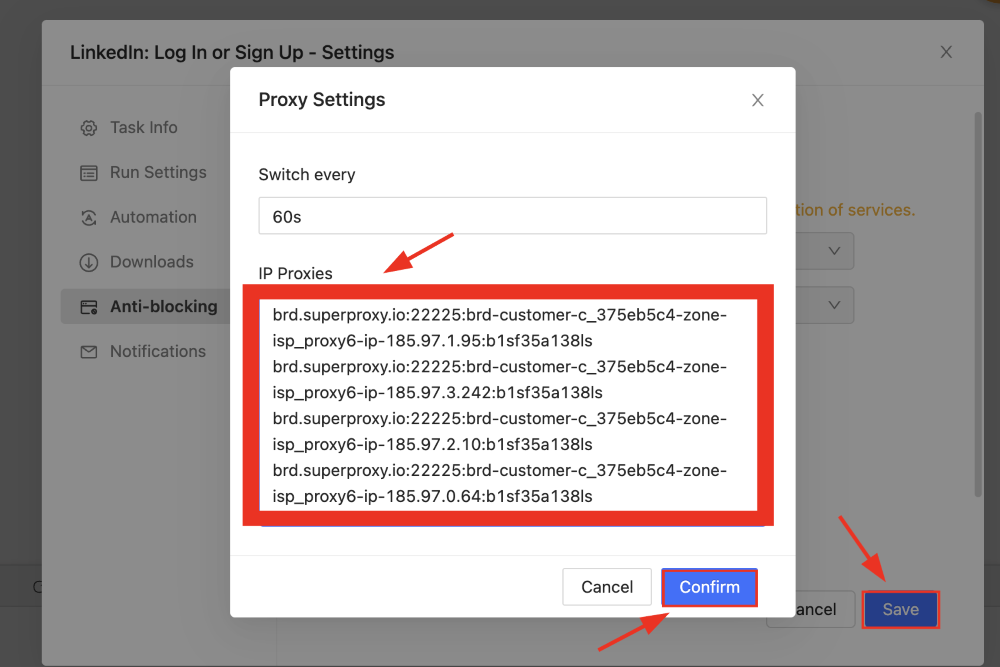
Cole os IPs no Octoparse:
Salve a configuração.
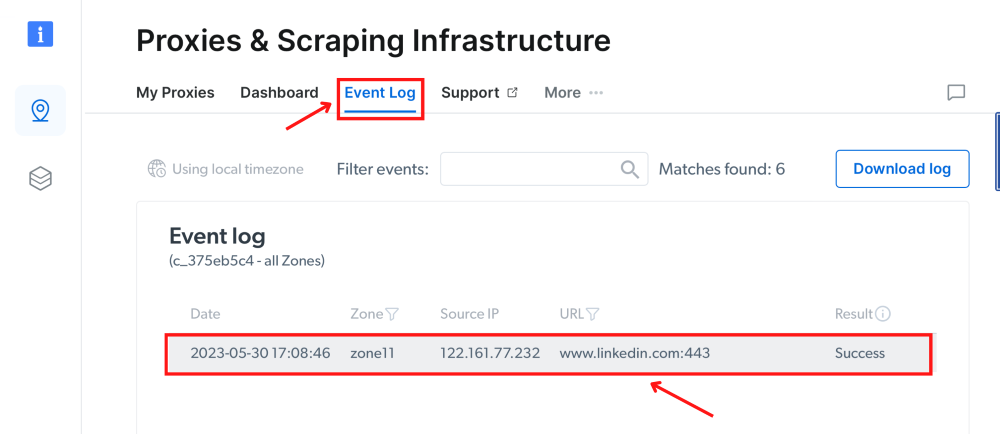
Log de eventos:
Para confirmar o uso do seu Proxy Bright Data, consulte a seção Log de eventos no seu painel de controle de Proxies e Infraestrutura de scraping.
⚠️Observação importante: se você estiver usando os Proxies residenciais, o Web Unlocker ou a API SERP da Bright Data, será necessário instalar um certificado SSL para habilitar conexões seguras de ponta a ponta com seus sites de destino. Esse é um processo simples. Consulte https://docs.brightdata.com/general/account/ssl-certificate#installation-of-the-ssl-certificate para obter instruções.
Pronto para começar?

Angetrieben von einem preisgekrönten Residential-Proxy-Netzwerk
Über 400M+ monthly residential IPs, erstklassige Technologie und die Fähigkeit jedes Land, jede Stadt, jeden Anbieter und jede ASN zu erreichen, machen unsere Premium-Proxy-Dienste zur ersten Wahl für Entwickler
Ein Proxy für jeden Entwicklungspfad
Kombinieren Sie Netzwerke, Peers und IPs, um Ihren kontinuierlichen Web-Datenfluss zu optimieren.


Proxy Network Pricing


- Unbegrenztes Volumen
- Unbegrenzte Sitzplätze
- Premium - SLA
- 99,99 % Netzwerkverfügbarkeit
- Kostenloser Proxy-Manager
- Vollständige Datenabdeckung
- Custom price per GB
- Maßgeschneiderte Lösungen
- Unbegrenztes Volumen
- Unbegrenzte Sitzplätze
- Premium - SLA
- 99,99 % Netzwerkverfügbarkeit
- Kostenloser Proxy-Manager
- Vollständige Datenabdeckung
- Custom price per GB
- Maßgeschneiderte Lösungen
- Unbegrenztes Volumen
- Unbegrenzte Sitzplätze
- Premium - SLA
- 99,99 % Netzwerkverfügbarkeit
- Kostenloser Proxy-Manager
- Vollständige Datenabdeckung
- Custom price per GB
- Maßgeschneiderte Lösungen
Der führende Anbieter von Proxies und Datenerfassung


