Benutzerdefinierte Tool-Gruppen – Startagenten in Minuten statt Tagen
Gestern haben wir Tool-Gruppen vorgestellt, mit denen Sie Ihren MCP-Server auf bestimmte Bereiche wie E-Commerce oder soziale Medien beschränken können. Heute gehen wir noch einen Schritt weiter: Benutzerdefinierte Tool-Gruppen.
Sie können jetzt Ihre eigene MCP-Serverinstanz mit genau den Tools erstellen, die Sie benötigen – nicht mehr und nicht weniger. Ganz gleich, ob Sie einen hochspezialisierten Kundensupport-Mitarbeiter oder einen Forschungsassistenten mit chirurgischer Präzision benötigen, mit benutzerdefinierten Tool-Gruppen können Sie diese in wenigen Minuten mit unserem neuen Konfigurationsassistenten konfigurieren.
Das Problem: Eine Größe passt nicht für alle
Tool-Gruppen lösten das Problem der Kontextverschmutzung, indem sie Ihnen die Auswahl vordefinierter Cluster wie „Soziales“ oder „Browser“ ermöglichten. Was aber, wenn Ihr Anwendungsfall nicht eindeutig in eine Kategorie passt?
Nehmen wir an, Sie entwickeln einen Agenten für die Preisüberwachung. Sie benötigen:
- Amazon-Produktsuche
- eBay-Produktdaten
- Google Shopping Insights
Sie benötigen jedoch weder Walmart, Target noch die 15 anderen E-Commerce-Datensätze in der ECOMMERCE- Gruppe. Das Laden dieser Daten verschwendet Tokens und lenkt das Modell ab.
Oder stellen Sie sich einen B2B-Recherche-Agenten vor, der nur Folgendes benötigt:
- LinkedIn-Personenprofile
- LinkedIn-Unternehmensdaten
- Suchmaschine (zum Finden von Leads)
Sie brauchen weder Amazon noch Walmart oder andere E-Commerce-Tools. Diese sind nur störend.
Die Lösung: Granulare Tool-Auswahl
Wir haben unseren MCP-Server erweitert, um die Anpassung pro Tool über URL-Parameter zu unterstützen. Sie können nun genau die Funktionen auswählen, die Ihr Agent benötigt.
So funktioniert
Im Hintergrund extrahiert unsere Authentifizierungsschicht einen Tool -Parameter aus der Verbindungs-URL und erstellt dynamisch das Tool-Manifest:
function extract_url_params(request){
    const url = request.url || '';
    const params = {};

    // Extrahieren einzelner Tool-Parameter
    const tools_match = url.match(/tools=([a-zA-Z0-9_,]+)/);
    if (tools_match)
    {
        const tools_str = tools_match[1];
        params.tools = tools_str.split(',')
            .map(t=>t.trim())
            .filter(Boolean);
    }
    return params;
}
Wenn Sie ?tools=web_data_amazon_product,search_engine angeben, erstellt der Server einen zulässigen Toolsatz, der nur diese beiden Tools enthält:
function build_allowed_tools(groups = [], tools = []){
    const allowed = new Set();
    for (let groupId of groups)
    {
        const group = Object.values(GROUPS).find(g=>g.id==groupId);
        if (group)
        {
            for (let tool of group.tools)
                allowed.add(tool);
        }
    }
    for (let tool of tools)
        allowed.add(tool);
    return allowed;
}
Schließlich überprüft jedes auf dem Server registrierte Tool, ob der Client Zugriff hat:
const add_tool = tool=>{
    server.addTool({
        ...tool,
        canAccess: auth=>{
            // Der Pro-Modus gewährt Zugriff auf alle Tools.
            if (auth?.proMode===true)
                return true;
            // Überprüfen, ob das Tool im zulässigen Satz enthalten ist
            if (auth?.allowedTools && auth.allowedTools.size)
                return auth.allowedTools.has(tool.name);
            // Standardmäßig auf pro_mode_tools-Liste zurückgreifen
            return pro_mode_tools.includes(tool.name);
        },
    });
};
Das Ergebnis? Der MCP-Client sieht nur die Tools, die Sie ausdrücklich zugelassen haben. Keine Ablenkungen. Keine verschwendeten Tokens.
Der Konfigurationsassistent: Einrichtung ohne Programmierung
Beispiel aus der Praxis: Agent für Preisüberwachung
Lassen Sie uns Schritt für Schritt einen Agenten für die Preisüberwachung erstellen.
Schritt 1: Wählen Sie Ihre Tools
Sie benötigen:
web_data_amazon_product– Aktuelle Amazon-Preise abrufenweb_data_ebay_product– Vergleich mit eBay-Angebotenweb_data_google_shopping– Überprüfen Sie Google Shopping-Trendssearch_engine– Finden Sie Produkt-URLs (in den Basis-Tools enthalten)
Schritt 2: Konfigurieren Sie über den Assistenten
Öffnen Sie den Assistenten, geben Sie Ihren API-Token ein und verwenden Sie den benutzerdefinierten Tool-Parameter:
?tools=web_data_amazon_product,web_data_ebay_product,web_data_google_shoppingDer Assistent überprüft Ihre Konfiguration und generiert die Verbindungs-URL.
Schritt 3: Verbinden Sie Ihren Agenten
Fügen Sie die URL in Ihre MCP-Client-Konfiguration ein (z. B. claude_desktop_config.json von Claude Desktop):
{
  "mcpServers": {
    "preisüberwachung": {
      "command": "npx",
      "args": [
        "-y",
        "@brightdata/mcp",
      ],
      "env": {
        "BRIGHTDATA_API_TOKEN": "YOUR_TOKEN",
        "TOOLS":"web_data_amazon_product,web_data_ebay_product,web_data_google_shopping"
      }
    }
  }
}
Schritt 4: Starten
Ihr Agent verfügt nun über genau 4 Tools in seinem Kontext:
search_engineweb_data_amazon_productweb_data_ebay_productweb_data_google_shopping
Anstelle von über 60 Tools, die die Systemaufforderung verstopfen, haben Sie nun 4. Die Aufmerksamkeit des LLM ist laserfokussiert.
Kombination von Gruppen und benutzerdefinierten Tools
Hier ist der entscheidende Vorteil: Sie können Tool-Gruppen mit benutzerdefinierten Tools kombinieren.
Beginnen Sie mit einer Basisgruppe und fügen Sie dann einzelne Tools hinzu:
&groups=social&tools=web_data_amazon_productDadurch erhalten Sie:
- Alle Social-Media-Tools (LinkedIn, TikTok, Instagram usw.)
- Plus Amazon-Produktdaten
Anwendungsfall? Ein Influencer-Marketing-Agent, der:
- Creators auf TikTok findet
- Ihre Produktnennungen analysiert
- Querverweise zu Amazon-Produktbewertungen erstellt
Sie haben einen hybriden Agenten mit chirurgischer Präzision entwickelt.
Auswirkung auf die Leistung: Noch schlanker als Tool-Gruppen
Gestern haben wir gezeigt, dass Tool-Gruppen die System-Prompt-Token um ~60 % reduzieren, verglichen mit dem Laden aller über 60 Tools.
Custom Tools geht noch einen Schritt weiter:
| Konfiguration | Geladene Tools | Geschätzte Token-Reduzierung |
| Vollständige Suite | Über 60 Tools | Ausgangsbasis (0 %) |
Tool-Gruppe (z. B. Social Media) |
~25 Tools | ~60 |
| Benutzerdefinierte Tools (z. B. 4 Tools) | 4 Tools | ~85 % |
Warum ist das wichtig?
- Geringere Latenz – Der anfängliche Handshake ist schneller
- Höhere Genauigkeit – Das Modell halluziniert keine Parameter aus irrelevanten Tools
- Kosteneinsparungen – Sie zahlen für weniger Eingabetoken bei jeder Anfrage
Token-Optimierung über die Tool-Auswahl hinaus
Benutzerdefinierte Tools sind nur ein Teil unserer Strategie zur Token-Reduzierung. Wir haben auch die Ausgabeseite optimiert:
ARIA-Snapshot-Filterung
Bei der Verwendung von Scraping-Browser-Tools erhält der Agent einen DOM-Snapshot. Ein vollständiger Snapshot kann jedoch Tausende von Tokens umfassen.
Wir filtern ihn, um nur interaktive Elemente (Schaltflächen, Links, Formularfelder) anzuzeigen:
export class Aria_snapshot_filter {
    static INTERACTIVE_ROLES = new Set([
        'button', 'link', 'textbox', 'searchbox', 'combobox', 'checkbox',
        'radio', 'switch', 'slider', 'tab', 'menuitem', 'option'
    ]);
Und wir formatieren Elemente kompakt und kürzen lange Namen ab:
static format_compact(elements){
    const lines = [];
    for (const el of elements)
    {
        const parts = [`[${el.ref}]`, el.role];
        if (el.name && el.name.length>0)
        {
            const name = el.name.length>60 ?
                el.name.substring(0, 57)+'...' : el.name;
            parts.push(`"${name}"`);
        }
        // Kompakte Formatierung
    }
    return lines.join('n');
}
Ergebnis? Ein Browser-Snapshot, der zuvor 22.000 Tokens umfasste , umfasst nun nur noch 3000 Tokens. Der Agent erhält weiterhin alle Informationen, die er zum Klicken auf Schaltflächen und Ausfüllen von Formularen benötigt, jedoch ohne überflüssigen Ballast.
Domänenbasiertes Browser-Sitzungs-Caching
Wir speichern auch Browser-Sitzungen pro Domain im Cache, um unnötige Neustarts zu vermeiden:
export class Browser_session {
    constructor({cdp_endpoint}){
        this.cdp_endpoint = cdp_endpoint;
        this._domainSessions = new Map();  // Cache-Sitzungen pro Domain
        this._currentDomain = 'default';
    }

    async _getDomainSession(domain, {log}={}){
        if (!this._domainSessions.has(domain))
        {
            this._domainSessions.set(domain, {
                browser: null,
                page: null,
                browserClosed: true,
                requests: new Map(),
            });
        }
        return this._domainSessions.get(domain);
    }
Wenn Ihr Agent Amazon automatisiert, bleibt der Browser für nachfolgende Amazon-Vorgänge geöffnet. Dies verkürzt die Ausführungszeit um 2–3 Sekunden pro Aktion und reduziert die Token-Nutzung durch wiederholte Initialisierungsprotokolle.
Probieren Sie es aus
Custom Tools ist jetzt live auf dem Web-MCP-Server verfügbar.
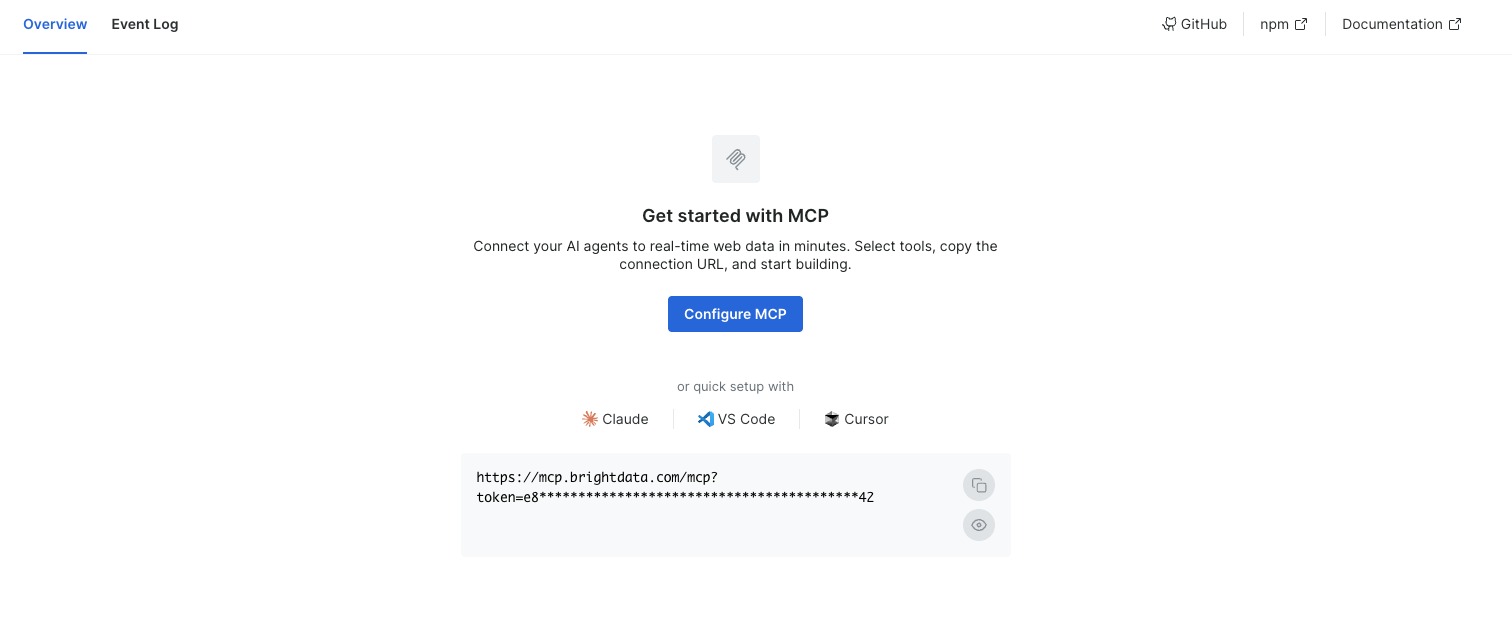
Verwenden Sie den Assistenten
Besuchen Sie unser MCP-Kontrollfeld, um auf den Konfigurationsassistenten zuzugreifen. Geben Sie Ihr API-Token ein, wählen Sie Ihre Tools aus und erhalten Sie eine einsatzbereite Verbindungs-URL.
Kostenlose Nutzung
Melden Sie sich für 5.000 kostenlose Anfragen pro Monat für Basis-Tools (Web Unlocker und Suchmaschine) an. Perfekt für die Prototypentwicklung Ihres benutzerdefinierten Agenten.
Morgen: Wir veröffentlichen etwas, an dem wir seit Monaten arbeiten. Es wird Ihre Sichtweise auf agentenbasierte Workflows verändern. Bleiben Sie dran.